Required Downloads:
Warning:
- You need to root your Sony Xperia Tipo before attempting to install this custom ROM.
- Rooting and installation of custom ROM’s on an Android Smartphone tends to void its warranty.
- We are not responsible if you damage your Sony Xperia Tipo during or after completing the tutorial written below. Therefore, proceed at your own will only.
Process To Update Sony Xperia Tipo To Kitkat 4.4.2 Via CM11:
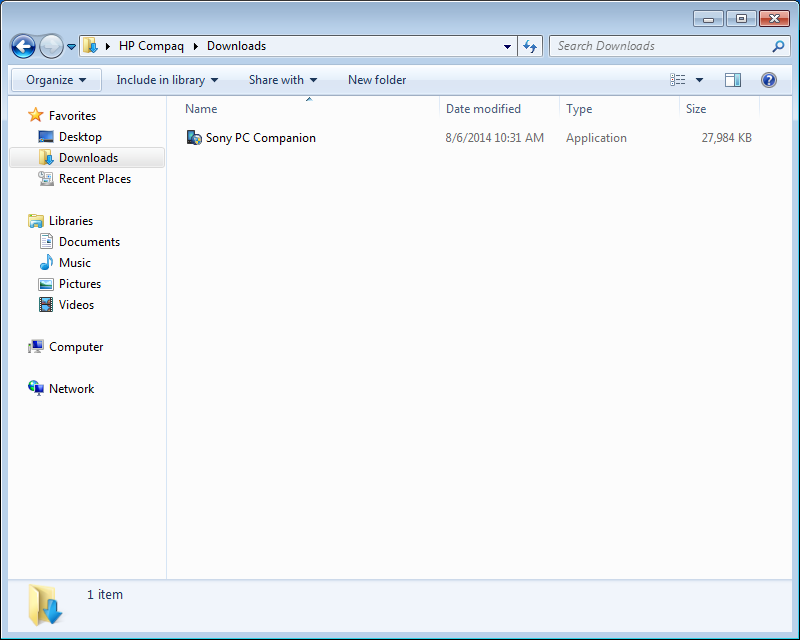
- Install PC Companion on your Laptop (or) PC.


- Install Unlock Root Pro on your Laptop (or) PC.


- After completion of installation Unlock Root Pro gets automatically launched but don't use it. Close the launched Unlock Root Pro because the Unlock Root Pro gets updated automatically to latest version.
- Open the Unlock Root Pro for second time and you are asked to enter "Registration Key". Enter the following keys below.
URPAVBLGBLSHNNFYOQKI
URPJWYFIKEHMXUDZWSDC
URPTKVMURDKBFEYNOFUK


- Connect Sony Xperia Tipo Via USB to your PC (or) Laptop, make use that Debugging Mode is ON in Developer Options of Sony Xperia Tipo.


- Wait until the Unlock Root Pro identifies your device.
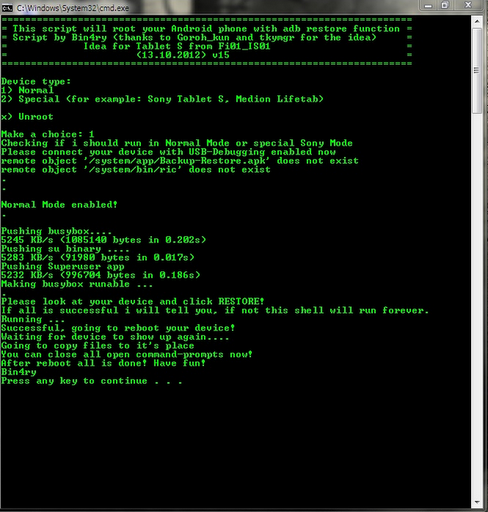
- Select the option "Root" after Unlock Root Pro identifies your device.

- This process make take few minutes to complete, after completion of process you will getting a message saying that "Rooting Successfully Done And Your Device Will Be Re-booting", the device automatically get Re-booted with this stage you done with Rooting your Sony Xperia Tipo.


- After Re-booting again connect your device to PC with Debugging Mode ON.
- Extract CWM.zip file which you have already downloaded.


- Open folder Tipo and run install.bat.


- You will see Command Prompt on you screen saying that "please press any key to continue installation" press any of key in your key board.
- With the press of a key in key board the installation gets started, this might few minutes to complete installation, with this completion of CWM installation you are half way done.
- Next step is to Extract Flash Tool which you have already downloaded


- Run FlashTool.exe and install according to the instructions displayed on your screen of your Laptop.


- After installing Flash Tool Go to Computer > Local Disk (C:) > Program Files > Flash Tool > Driver. In Driver folder you will find FlashTool-drivers.exe.


- Run Flashtool-drivers.exe.

- In next step of installation you will be asked to select the drivers you want to install.
- Then select two drivers named as "Flashmode Drivers, Fastboot Drivers" and click "Install".


- When undergo installation process you will getting many error on you screen as displayed below.

- Please be patient and click "Install Any Way" as many errors you come across and complete installation of drivers successfully.


- After completing the installation according to above displayed Images, Go to Start > All Programs > Flashtool > Open Flashtool.

- Connect Sony Xperia Tipo Via USB cable to PC (or) Laptop, make sure that the Debugging Mode is ON in your Developer Options.
- Click on the BLU button which be situated beside symbol of Flash.

- After selecting the BLU button you will be asked to Switch Off your device connect your Device in Flash Mode.
- Tip: You should connect the USB cable very quickly that it should done in between the vibration and a blink of Green LED On your device. If you have done it correctly the Green LED stays ON for a longer time.
- After Completing Flashmode installation again you will be asked to Switch Off your device and re-boot in Fastboot mode it is same as you connect your phone in Flashmode but with one change, you should press hold Power + Volume Up.
- After Completing Both Flashmode and Fastboot mode installation Copy the downloaded CM11 and Google App Kit for CM11 to you internal memory of your device.
- After Copying CM11 and Google App Kit for CM11 to internal memory of device Switch Off your device and enter CMW Mode by press holding Power + Volume up buttons.
- Once the recovery mode in loaded, perform a “Data Factory Reset”, “Wipe Cache Partition” and “Wipe Dalvik Cache”.
- Now choose the “Install ZIP From SD Card” option.
- Then choose the ROM installation kit that you downloaded earlier.
- The ROM will now be installed on your Sony Xperia Tipo.
- Then again choose the “Install ZIP From SD Card” option.
- And this time, choose the Google Apps kit that you downloaded earlier.
- The Google Apps kit will now be installed on your Sony Xperia Tipo.
- Now click on the “Reboot System Now” option.
- Your Sony Xperia Tipo will now reboot.
Congratulations, you have finished the tutorial on how to update Sony Xperia Tipo to Kitkat 4.4 via CM11.
No comments:
Post a Comment